
At a glance
- Design: modern French tips using two or three adjacent cool blue shades.
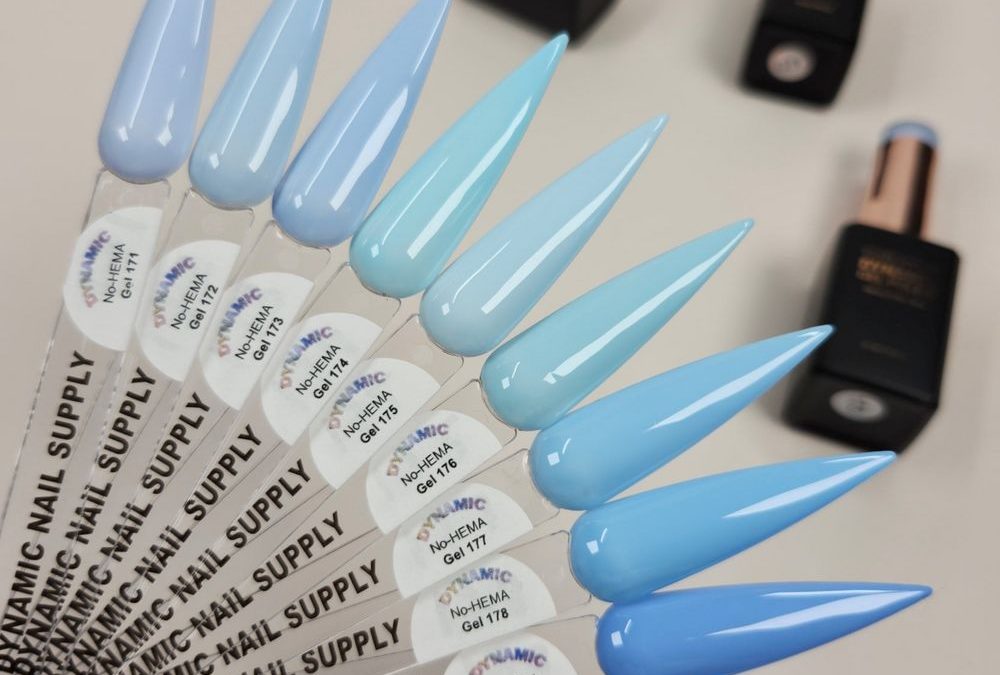
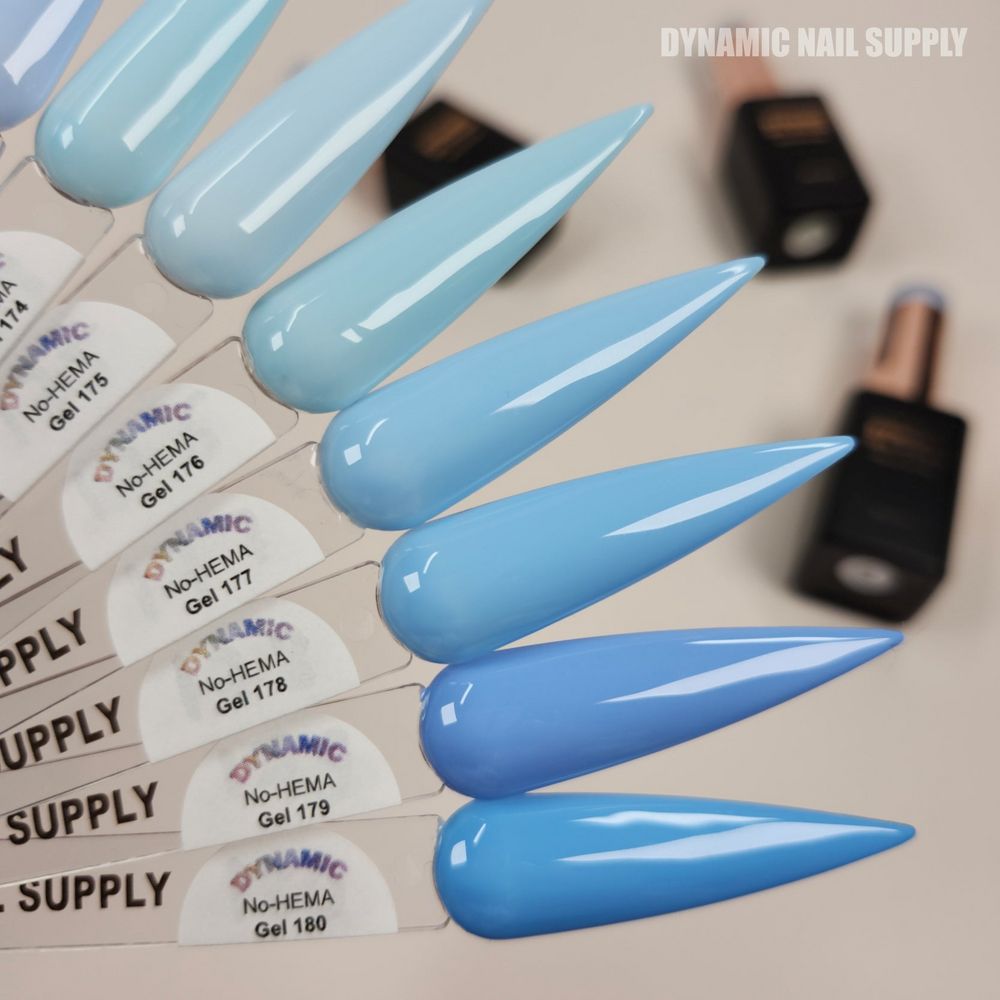
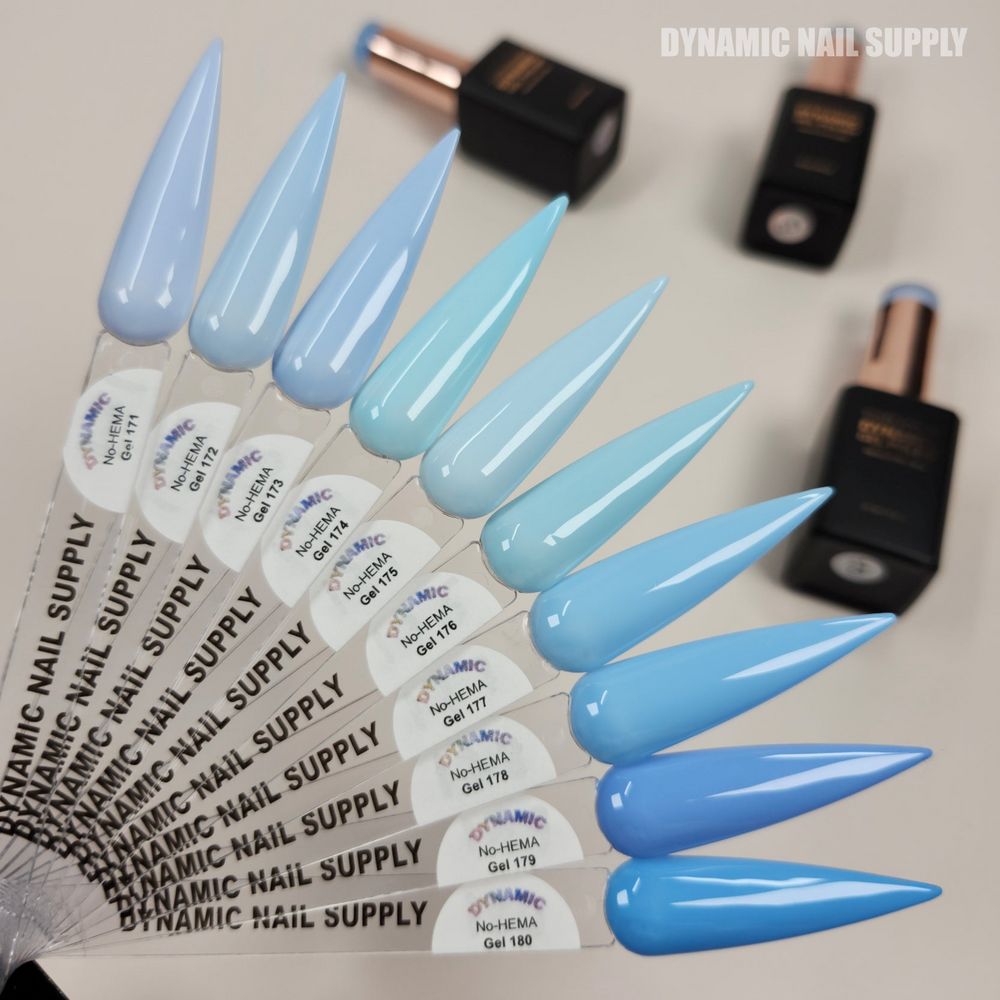
- Palette: ten cool, cream blues from very pale periwinkle to cornflower.
- Finish: opaque, high-gloss cream — no shimmer or particles.
- Best for: short or almond nails; works with stencils or freehand smile lines.
- Cure time: 60–120s under a UV/LED lamp per layer.
- Size: 15ml pots; single colors priced individually (prices may change).
What this short how-to covers
This review shows a compact workflow for pastel blue french tips using two or three adjacent shades from the cool-blue range. The goal is a crisp cream finish with clean smile lines. Readers will get prep notes, two layout options (stencil and freehand), and quick finishing tips that suit both short and almond nails.
Prep and tools — keep it simple
Start with a clean, dry nail. Lightly buff the surface to remove shine, then wipe with a lint-free pad and a nail cleanser. Thin, even layers matter here: thicker passes shift where the smile line sits and can flood stencils.
Essential tools:
- Thin liner brush and a flat round brush.
- French-tip stencils or thin adhesive tape for consistent lines.
- 15ml pots of the blue range, base and top coat, cure lamp.
Common mistake: applying a thick base coat and assuming the cream will self-level. It won’t if the cure is rushed. Thin base, full cure.
Technique: two-shade French (short nails) — stencil method
Best for short nails that need a neat, slightly raised smile line. Pick two adjacent tones from the palette: a paler periwinkle for the tip and a slightly deeper sky blue for a narrow band or shadow just below it.
- Apply a thin base layer and cure fully (60–120s).
- Place the stencil so the smile line hits where you want it. Press edges flat.
- Paint the tip area with the paler shade. Use the flat round brush for even coverage. Cure.
- Remove the stencil. With the liner brush, add the deeper shade as a thin band at the base of the tip for subtle contrast. Cure.
- Finish with a thin, full-coverage top coat and final cure for glossy, sealed edges.
Common mistake: lifting the stencil too soon. Always cure the painted layer while the stencil is in place to avoid ragged edges.
Use gel polish collection when aiming for a crisp, cool-blue progression in two- or three-shade pastel blue french tips.
Technique: three-shade French (almond nails) — freehand gradient
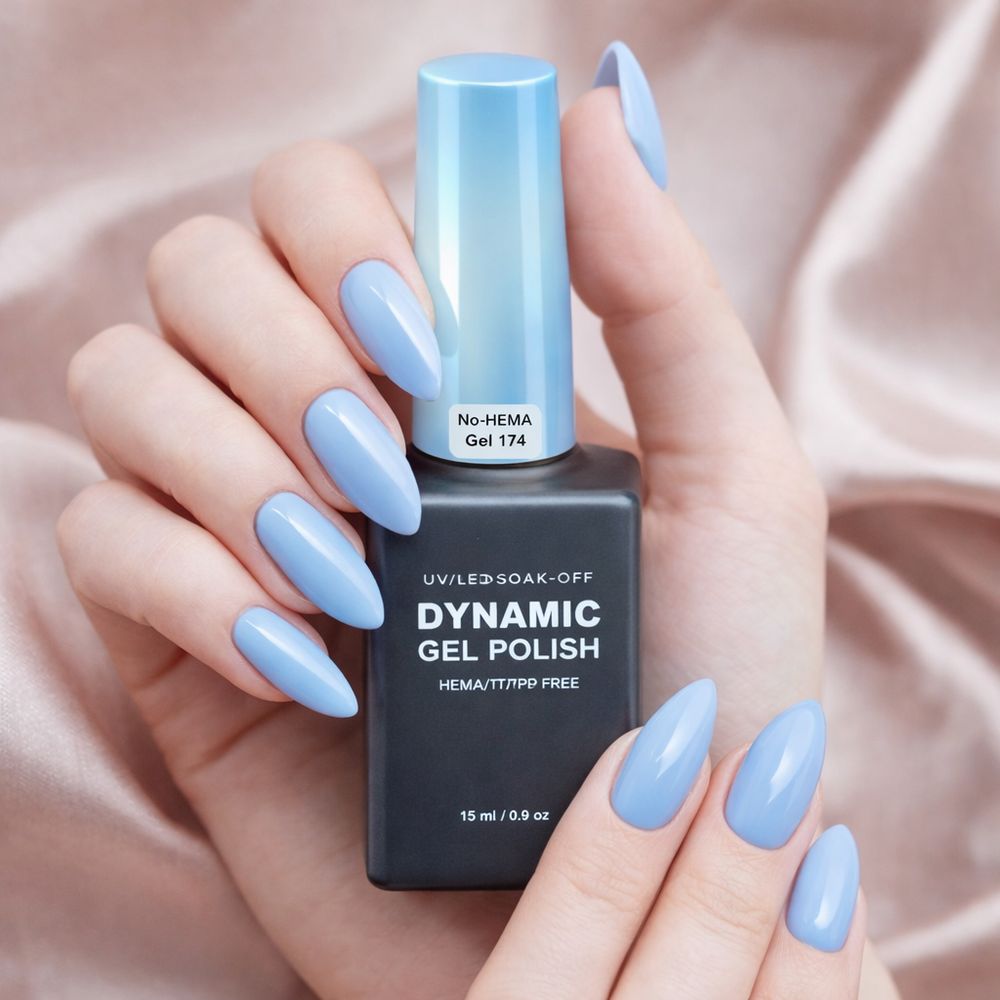
Almond or longer shapes show more gradient. Use three adjacent colors: the palest periwinkle at the extreme smile edge, a mid-sky blue for the main tip, and a cornflower tone to anchor the tip’s inner edge.
- After base coat and cure, block in the main tip color with thin passes. Cure.
- Using a small flat brush or a dampened one-stroke technique, feather the paler shade into the tip edge to soften the smile line. Cure the feathered edge lightly (short cure).
- Add the deepest of the three at the tip’s base and blend slightly toward the center to create depth. Cure.
- Seal with a full top coat and final cure. Clean the edges with a tiny brush dipped in cleanser if needed.
Common mistake: over-blending mid-cure. Blend while the product is still tacky but not wet; too much brushing thins the cream finish and shows streaks.
Spotlight: No-HEMA Gel 171
No-HEMA Gel 171 reads as a very pale periwinkle on the swatches. It sits at the light end of the ten-shade progression and works best as the outer smile edge or the highlight in a two-or three-tone French. Its opacity helps the tip read clean and airy, especially on short shapes where a thin, bright edge is key.
For delicate two-tone looks, start with Gel 171 on the very edge and pair it with Gel 172 or Gel 173 just behind it for a subtle but visible shift in tone.
When building the set mood, consider that the palette runs from muted baby blue to bright cornflower; the smooth, cream opacity keeps each shade readable even in thin layers.
Finishing touches and safe handling
Top coat selection matters. Choose a glossy, no-wipe top coat if a high-gloss cream finish is desired. Thin top coats prevent pooling at the smile line and preserve the hard edge look.
Removal and handling: cure fully before filing or shaping. Remove cured layers with appropriate soak-off methods rather than force. Keep product away from eyes and open skin. Work in a ventilated area and avoid prolonged skin contact with uncured gel. If irritation occurs, stop use.
Quick troubleshooting and styling notes
- Blotchy edge: thin the brush load; cure each thin pass.
- Muddy blend: stop brushing; cure and then add a thin corrective line with the paler shade.
- Too-bold smile line: soften with a tiny amount of the base shade along the edge and re-cure.
Common mistake: assuming HEMA-free equals no prep. The HEMA-free formula still needs proper adhesion steps to avoid early lift.
Bottom line: This ten-shade cool-blue range gives a clean, airy toolkit for pastel blue french tips. The opaque, cream finish keeps smile lines crisp and photo-ready whether a user chooses stencil control for short nails or a soft freehand gradient for almond shapes. Try Gel 171 as the pale edge for delicate looks; the set’s smooth progression makes two- and three-shade mixes effortless. Prices start around $8 per shade and may change. Explore the shade progression and try a two- or three-shade layout to see how the cool, airy blues transform a classic French tip.